
[MAYA]
[INSPIRATION]
As soon as i thought about domino effect, i remembered this inspirational video during childhood. I found it amazing how everything synced together very well. The video was an advert for Honda.
An actual domino effect which is very long! (hope it was worth it)
CGI animations which gave me an idea as to how my animation could look.
[PLANNING]

This is the kind of feeling and atmosphere i wanted in my animation, where the rays of the afternoon sun would create grids from the pattern of the blinds.
{Refer to RVJ for more planning work}
[PRODUCTION]
As soon as i thought about domino effect, i remembered this inspirational video during childhood. I found it amazing how everything synced together very well. The video was an advert for Honda.
CGI animations which gave me an idea as to how my animation could look.
[PLANNING]
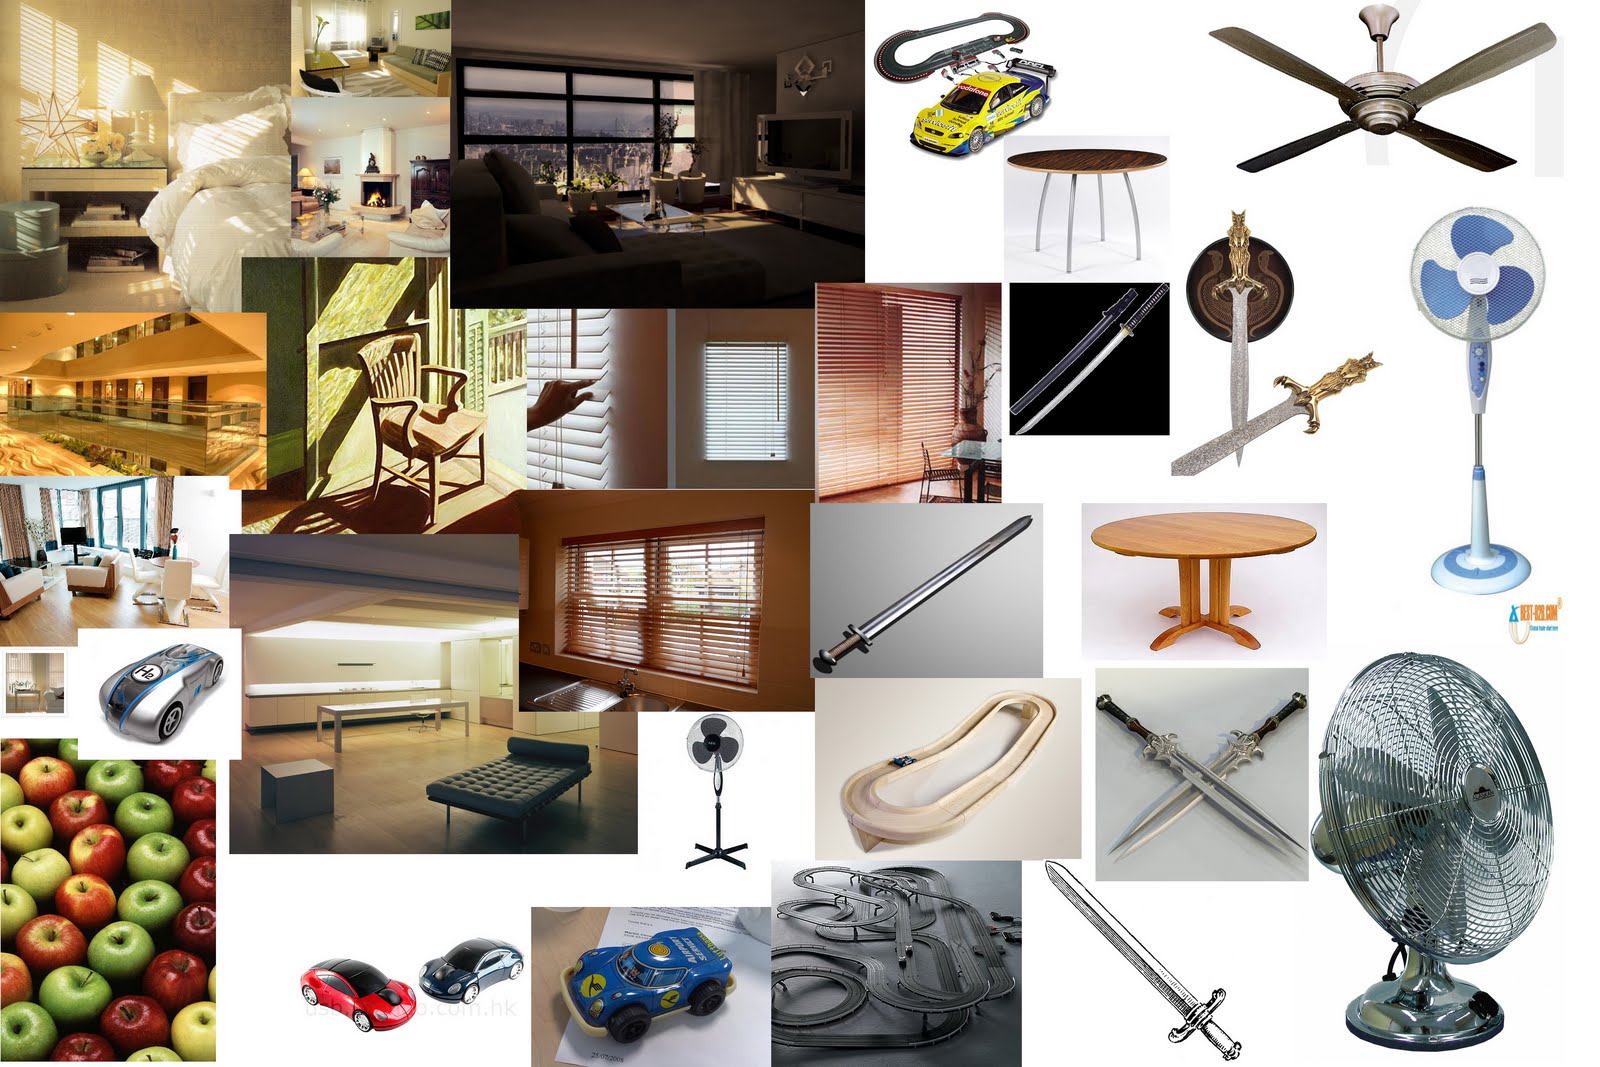 |
| Moodboard |

This is the kind of feeling and atmosphere i wanted in my animation, where the rays of the afternoon sun would create grids from the pattern of the blinds.
 |
| Top, side and front view of a fan |
 |
| Top, side and front view of ipod deck |
{Refer to RVJ for more planning work}
[PRODUCTION]
Sword


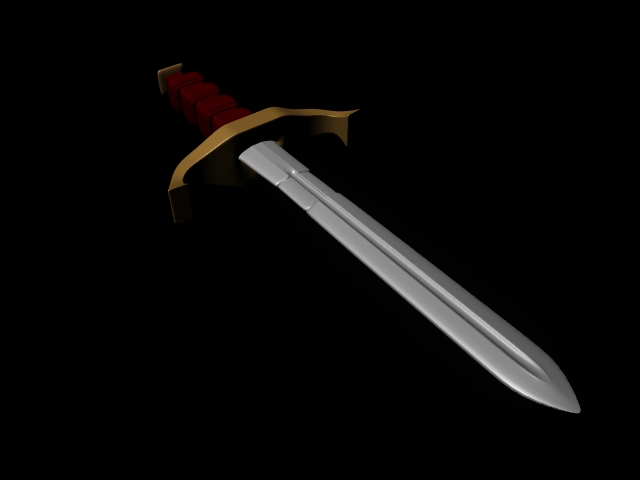
After following the VTC tutorials provided, i managed to follow what was being said, and in doing so, i gave form to my first CG render which is a sword. I experimented with rendering, as it being my first time and used different angles to capture the essence of the sword. I found this quite successful as a first attempt, and gave me a great insight to modelling using polygons.
--
--
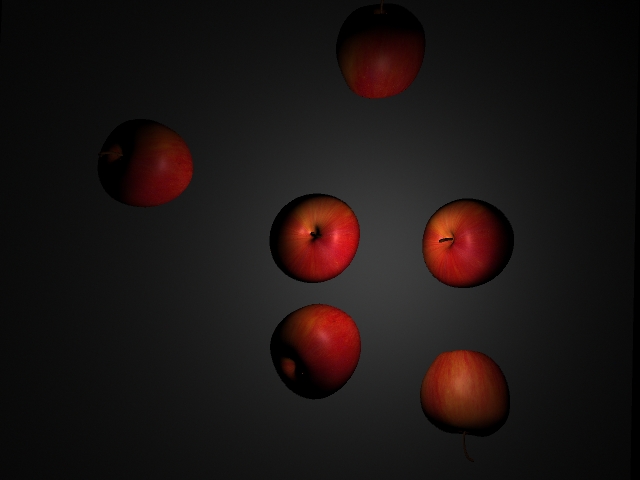
Apples


 |
| Reference image |
 |
| Apple texture used. |
Following my sword render, i decided to create a more basic shape following the tutorial on this website: http://www.swinburne.edu.au/design/tutorials/P-maya/T-Maya-Modeling-Modeling-an-apple-using-polygons/ID-154/
I experimented further with lighting and setting the scene, the effect of multiple apples came from duplicating just one, and rotating and moving them to make them look scattered.
--
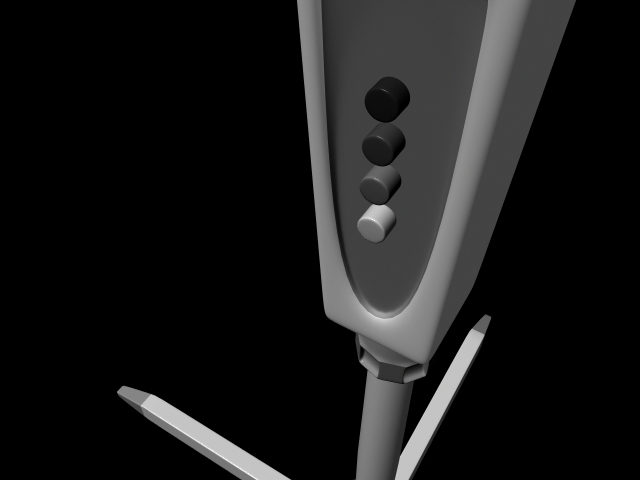
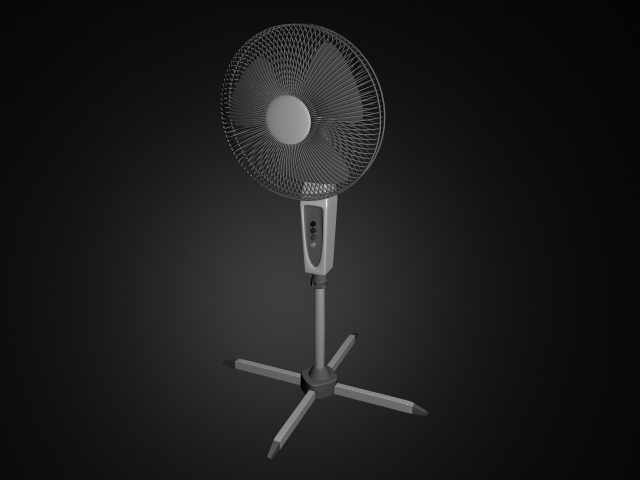
Fan

 |
| First attempt, rubbish. |
 | ||||
| Second attempt, much better. |

I parented the three fan wings onto the part which connected the components together, that way animating it was easier, and kept everything in order.


 |
| Reference |
I made this fan using a real life reference, at this stage i was really determined to create something from a reference, without having to follow a tutorial, and use the knowledge i have to overcome this challenge. The only part i needed help on was the cage, which left me helpless, so i had to follow a tutorial on creating the cage of the fan: http://www.lugher3d.com/tutorials-for-maya/video-tutorial-maya-modelling-a-poly-table-fan. Besides the cage I can proudly say i created the rest of the fan with my own understanding. I was very pleased with the outcome and this gave me more knowledge and understanding of modelling. I textured everything using maya preset's, mainly blinn and lambert, two very useful textures, also hypershade helped me keep everything organised.
--
Table

 |
| Using a lattice |


 |
| Modelling reference |
 |
| Colour reference |
 |
| Texture used for table top |
 |
| Texture used for the body of the table. |
I grew more and more confident in modelling, and i decided to create this table which i was going to use for my story. At this point i knew what i was going to do, I pretty much was going to use all the things i modelled from my learning phases and put them all together to create a dynamic scene. The table was an essential part for my plans.
--
Toy cars


 |
| Reference |
 |
| Spoiler reference |
I created two basic toy cars, which was going to be part of my scene, and pretty much be the core of my animation. I found it quite difficult getting the shape right, as to how i wanted it.
---
[Final scene]
 |
| Photomontage |
 |
| Storyboard (3D) |
 |
| Blinds |
 |
| Lighting setup |

 |
| Final scene |
This was the final scene i put together, i felt somewhat satisfied with the overall composition and the atmosphere which i wanted to convey, but i still feel their could be an improvisation here, the lighting seems to be a little weird, I still don't know what it is exactly, but the room needs stronger exposure from the outside sunlight, as it seems to be weakly shown here. Also the lighting inside seems to be a little dull and stronger than expected. This could be because i chose the wrong lighting scheme, or due to my rendering choice, which was maya software, rather than using mental ray which simulates a more realistic and satisfying scene.
 |
| Texture for the floor |
 |
| Texture of the sword holder |
 |
| Wallpaper texture |
 |
| Graph editor |
The graph editor took me some time to understand how it works, so there was a lot of trial and error involved here.


I used motion paths to create my race track and use the same motion paths to animate the cars using the 'attach to motion path' option.
 |
| After effects |
I made the titles and put all my scenes together, including the music in after effects.
Tests
Some test which i created before my final animation, gave me an insight as to what camera and angles to use, to see if they work well.
[Sound]
I felt that adding this music video would go perfectly with this animation, as it is quite energetic, and thats exactly how i feel when i watch this video, the two together work quite well.
[FINAL]
This was my final animation! After a whole term of learning maya it came down to this.
I am quite satisfied and surpised that i made this, someone who looked at maya couple of weeks ago and was like 'wow, how am i gonna do this' and now i look at it and think to myself i done it, im quite proud of the progress i made, all the effort i have put in has shown and worked out quite well.
The Journey:
I had no knowledge of working in 3D programs whatsoever, i started from scratch. I pretty much followed VTC tutorials the whole way, that was my one true guide in learning maya the correct and most effective way. My first render was a sword, i followed the VTC tutorial to achieve the outcome, for a first attemp i find it okay, there were some flaws in the sword as halfway through modelling it, the mesh started becoming deformed underneath the handle part. I did not understand why that was, and i tried to fix it by moving the vertices and the edges to create a more neater looking polygon, but that just made it worse, as my lack of understanding maya prevented me from fixing it at that stage. If i could improve it now, i would just start again!
The apple i created had a good polygon mesh, but the texturing was where the difficulty was at, i did not understand the UV texture editor or spherical mapping at that stage, and it left the texture on the apple looking like motion lines.
As i started creating more and more objects, i.e the fan, the table, i got a much better understanding of how modelling works, and under different circumstances how to reach the outcome i wanted. For example when i created the table i felt that the legs are too small in comparison with the rest of its body, so to overcome this problem i created a lattice to extend the length of the leg to make it more porpotionate with the body, and i simply duplicated it two more times to be sure that all the legs were equal in size.
When i created the toy cars, they took a lot of time for me to model. I knew what kind of shape i wanted, but it was hard for me to achieve that organic looking car. I wanted the cars to have a more streamlined look, rather than simple polygon looking cars. I feel i have achieved the effect i wanted to an extent, but there could be more room for improvisation. The tyres were quite effective, and due to the nature of my work i didnt have to animate them, but if i did have to animate them i probably would have attached the tyres to cylinders, like how a real car works, and use constraints or parenting to animate them. I wasn't too fond of the amount of detail on the cars, as i only used basic texturing methods to preserve time, the windows of the cars were the main down factor in my opinion as they just dont look like right due to the structure of the polygon mesh. Next time i could have created the windows seperately for a more effective outcome.
When i created my scene i thought of an apartment with an afternoon setting. To help convey this i created a window with blinds. The window i had set a transparency up and put lighting behind it so that the light would shine through. Then i had placed blinds infront of the window, the blinds i created by making one strand of the blind and just duplicating it multiple times to create a set. When the blinds were in place, the light would shine through the strands and create the silhouetted shadow on the floor. This was quite an effective technique and worked quite well. The only downside to my set was the mood wasn't exactly how i wanted, it never had the right 'ambience'. I still can't put my finger on it, but im assuming its because of my choice of render settings, also when you look at the blinds and the window, there is no sense of exposure from the lighting outside, and the only instance of light you can see is on the floor, which creates the shape of the blinds and it doesnt make sense. I quite liked the colour scheme, i think it worked well, i tried out darker colours, but that just made the whole scene gloomy.
When i started animating i found it difficult to play with the camera and get a good angle, as the faces of the box would keep coming in the way, so i had to turn off the faces which caused obstruction, rather than making the box bigger, which would just make the whole set look empty. It was pretty much just like animating in real life, you can compare the similarities as you would when creating a stop motion piece, except you dont have to move the objects frame by frame, as maya does that for you, which is a big advantage compared to real life claymation. I found animating the scene quite fun, difficult at first, but once i got the hang of it, i found the results satisfying.
As i went through my scenes animating, i split my animation work in accordance to my storyboard, that way i could concentrate on a certain part rather than worrying about the whole thing. I started from the beginning and went through to the end, rather than doing certain scenes first. The graph editor was a very useful tool to touch up my animations and make them look more realistic, rather than having floaty objects, it made them look more 'earth-bound'.
I find that my strongest scene was when the second (blue) car made its appearance and zoomed to hit the sword. For this shot i experimented with the camera and i changed the focal length to achieve a more longer depth in the field, this was very effective, as it looked like a roller coaster ride of some sort, which was the effect i wanted to achieve while the camera follows the racing car into the sword and eventually hitting the floor while spinning around to show momentum.
I find that the animation of the apple was a bit floaty, and seemed unreal. I could definately have improved on this if i had more time. Also the sword seems to show some choppy motion, i wanted the sword to swing as an object would when hanging on peg bars, and the momentum would make the sword swing off the pegs causing it to drop, I think i have achieved this effect to an extent, but could definately improve more to reduce the choppy look.
Once i had animated all my scenes i put them together in after effects, including the music. I then created my titles, which i wanted to be along the similar lines of my animation, i found the titles to being quite effective and worked rather well.
Throughout this journey which i taken i have experienced a whole new world, which has opened up more possibilities for my creativity, and im pleased to say that maya has grown on me just as i expected it to, and i know which path i wish to continue on. In terms of my strongest points i think i would find modelling my most passionate, and i have an eagerness to learn more things to unleash my creativity on. In terms of animation, maya has a very good system for enabling a person to animate just how they would like, there is endless amounts of tools to craft your animation, i have merely touched the surface and there is still a long way to go (rigging, dynamics, expressions etc...).
In terms of principles, the following can apply (not necessarily shown in my work):
* Squash and stretch
* Exaggeration
* Anticipation
* Follow through and overlapping action* Arcs
* Ease in-ease out
* Timing
* Secondary action
* Staging
* Straight ahead/pose to pose
* Appeal
No comments:
Post a Comment